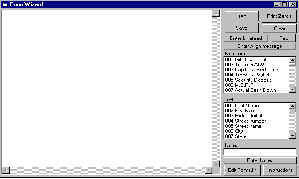
Open Button : A simple file retrieval, you need to know the name of the file you wish to edit. Using the format "XXXXX.LMW". The file must be in the LEASE Directory.
Save Button : Enter the file name using the format "XXXXX.LMW" this file will be saved in the LEASE directory.
Print Grid Button: This button will print to the selected printer port lines of Zero's with the letter "X" every 10 digits. These will aid in marking the coordinates of the items which need to be entered in the contract. You need to align the contract in the most comfortable manner and press this button. Later you can use a marker and highlight the areas where you will enter text and variables on the contract. When you select a variable to enter it will ask you for the Leading Spaces and Length of the highlighted area. and if you wish to enter N/A if Zero.
Enter Linefeed Button: Pressing this button will enter the "LF" (Line Feed) command on the text box. You must enter this command at the end of each line and at the beginning of any empty line. You can also press the F12 Key to get a line feed.
Enter Align message Button: This should be entered once only at the beginning of the document. Depending on the type of printer you use, you can enter the reference to guides and or printer heads that you used when printing the Zero's.
Numbers List Box: This is a list of all the Numerical variables used in the program. they all use 8 spaces.
Formula Box: Here you can enter formulas to calculate when the document is printed, you should use the Numerical variable number preceded by the operator. For example; to add then License Fee to the Bank Fee you should enter +008+024 in the formula box, to multiply the license fee with the term in years, you would enter +008*070.
The Number and Text boxes will expand when clicked or if you place the mouse arrow on top for a few seconds, this will help find the variable you need to use.
Text Box: This is a list of all the Text variables used in the program. the program will ask you for the maximum length for each variable. Sometimes you will notice two codes for the same variable, you may use any of them. The program will ask for the number of leading Spaces.
Notes Text Box: Here you may enter any Notes you wish to add to a contract permanently. Such as ("Subject to Credit Appr") after typing the Text you may press the Enter Notes Button.
Enter Notes Button:
This button enters the Text you typed in the Notes box.The program will ask you for the length of this field.
Edit Forms.INI button:
This button will load the forms.INI file for editing,remember the forms created here must be entered with the same format "description"+FORMWIZ.EXE XXXXX.LMW" You must maintain the same length and style.When you finish editing the file you must save it using the Save button and naming the file "FORMS.INI".
You can enter Special characters needed to write export utilities, you need to enter these characters directly in this Window.
CHR13 = Carriage Return CHR8 = Backspace CHR11 = Vertical Tab CHR12 = Form Feed CHR34 =Chr$(34)
Enter these in quotes the same way the program entered the linefeed "LF".
You may also alter the initial menu of the form by alternating the letters XX1, XX2 or XX3 in front of the LMW filename.
XX1 Will skip the Menu
XX2 Will give you a menu without the check boxes for options
XX3 Will give you a menu for 4 Additions only.
XXT Will let you edit the six labels by saving a LMR file.
If you replace the letter V for a variable with B then the program will double space the text fields to attempt to fill specific separated fields.
You will also notice that if you choose to enter N/A or None when the variable is blank the "N" or "V" will be replaced with "n" or "v".
XXF Will let you edit the check box labels as well as the other six. |